Full Installation:
Retrofit Installation:
Wall Finishing:
Invisible speaker installation
Installing a Stealth Acoustics Invisible Speaker is as simple as fitting a drywall patch! The speakers are built on a solid frame and baffle board that contain the traditional drivers, exciters, and crossovers found in most speakers. This portion mounts directly to the structural framing. The face of the speaker is smooth and durable and is designed to finish in a similar fashion to the wallboard surrounding it.
Stealth Acoustics’ speakers are equally at home in the wall or ceiling. When set in place against the framing, the edges of the speaker panel fit flush to the surrounding wallboard. The seams are taped and spackled using common materials and techniques. Simply sand the seams, apply your desired finish and then paint or wallpaper!
INSTALLATION DOWNLOADS
Invisible Speaker Installation Instructions: Download PDF
Acoustics Isolation Rules: Download PDF
B30g Installation Instructions: Download PDF
Basic Finish Tips: Download PDF
Bathroom Spas and Saunas: Download PDF
Heavy Plaster Finish Instructions: Download PDF
Joint Compound Installation Instructions: Download PDF
Subwoofer Installation Precaution: Download PDF
Wallpaper Finish Instructions: Download PDF
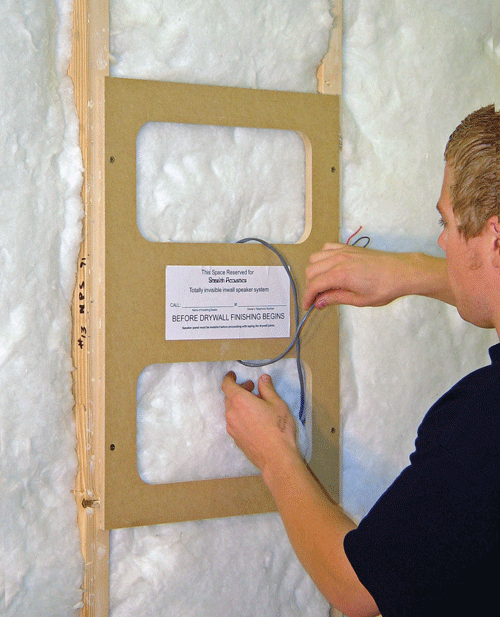
Step 1:
Install Place Saver and Pre-wiring
In new construction, PlaceSavers must be installed at the time when the job is pre-wired. Installing the PlaceSaver reserves the exact space for the speaker without subjecting the speaker panel to the harsh construction environment that it would be exposed to if it were installed before drywall. Exposing the unfinished speaker to long periods of high humidity, as sometimes found on a job site, should also be avoided. The PlaceSavers maintains the perfect size cutout for the speaker after the drywall installation is completed.
For the pre-wiring, install regular speaker wiring and attach it securely to the studs, leaving sufficient slack length to be able to connect to the speaker panel when installed. For runs of 50 feet or less, use 16 gauge wire. For runs longer than 50 feet, use 14 gauge wire.

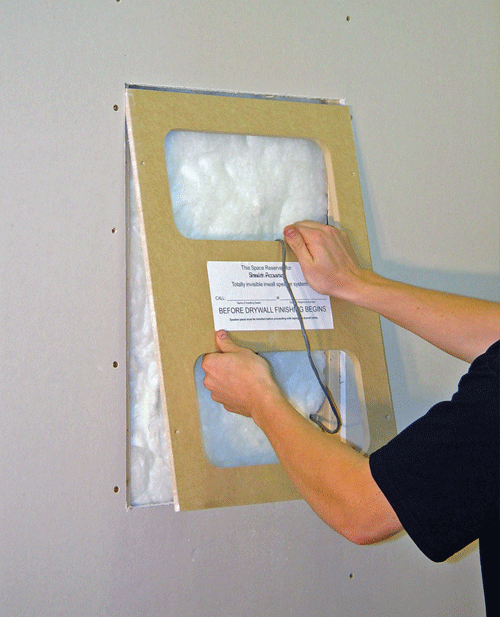
step 2:
Remove Place Saver
Remove the PlaceSavers once the drywall has been hung but not yet mudded and painted. Keep the PlaceSaver for future projects as they can be used over and over. A perfect size cutout should be maintained for the speaker once PlaceSaver is removed.

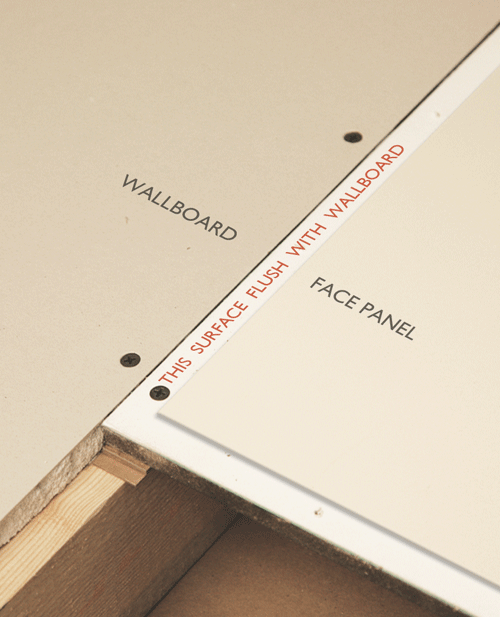
Step 3:
Check Speaker Registration
After the wallboard is installed around the speaker location, but before seam taping and mudding occurs, check speaker registration and wallboard thickness. Press the speaker panel into the opening to check the flushness of the perimeter of the speaker panel with the surrounding wallboard. (See the image to the left)
For correct registration, the perimeter edge of the face panel must be flush with the adjoining wallboard. It is critical to use the correct number of shims in Step 4 so that these surfaces are flush with one another. A failure to do this can (though rare) result in cracking around the perimeter of the speaker, caused by the uneven tape around the joint.

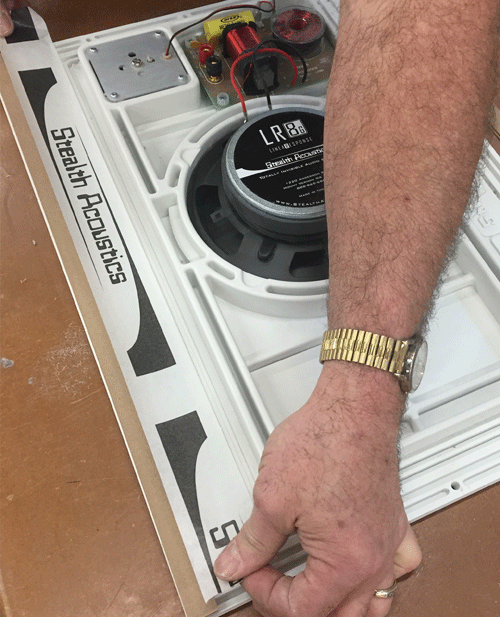
Step 4:
Install Shims if needed
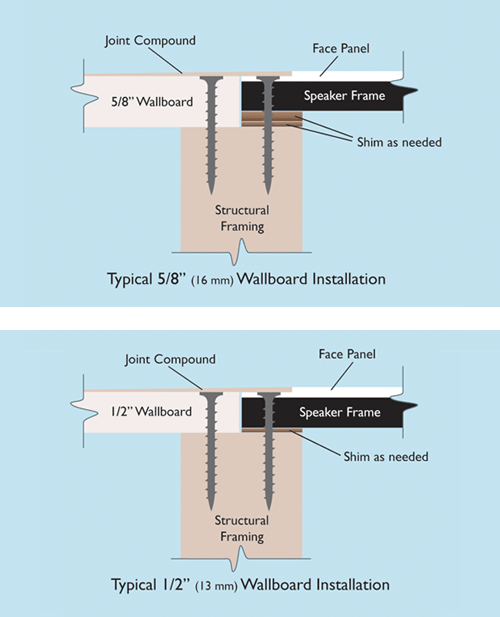
The screw flange perimeter of the speaker panel must be flush with wallboard, if it is recessed behind the wallboard, use the provided shims to bring the speaker panel flush. Tape is also provided to attach the shims to the backside of the speaker panel where the screw holes will align with the framing. Do not use the provided shim tape for taping and mudding the drywall.
For typical 1/2” (13 mm) wallboard installations, one thick shim (approx. 1/8”) is needed for correct registration and should be taped to the rear of the speaker prior to installation. For typical 5/8” (16 mm) wallboard installations, two thick shims are needed. Thin shims are also provided for minor adjustments to registration.
Note: The typical installations shown above are provided as guidelines. For your installation, the number and thickness of shims needed may differ due to variances in wallboard material and other construction variables.

Step 4 Cont…:
Shim detail
The detail to the right shows where to properly install the shims if needed to bring the edge of the speaker panel flush with the wallboard surrounding the speaker. Notice that more shims are required for thicker wallboard.

Step 5:
Connect Speaker Wires
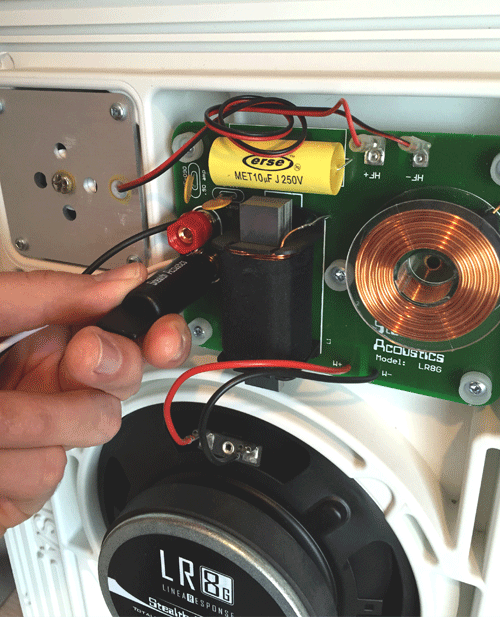
Insert the speaker wires into the binding posts on the speaker crossover, noting proper polarity. Tighten the binding posts securely using the provided plastic terminal wrench. Jiggle the wires and retighten for a snug fit. Do not overtighten. With smaller gauge wires, bend the exposed wire back upon itself prior to insertion to make better contact with the binding posts.

step 6:
Install Speaker
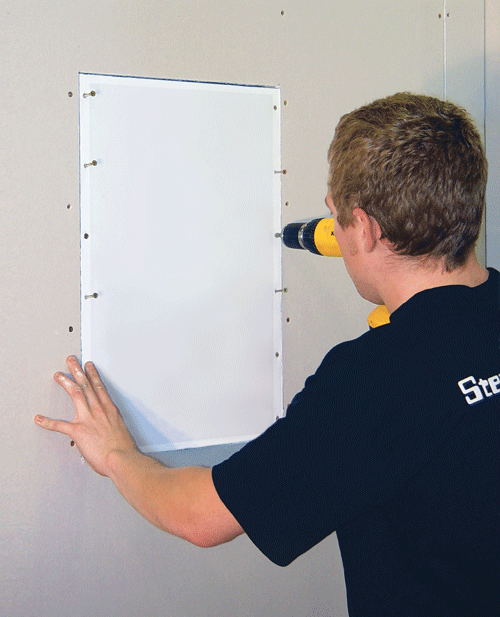
Attach the speaker panels directly to the structural framing using the provided drywall screws. The panels have been pre-drilled with the proper number of holes. Be sure that all of the screws are installed and that they hold securely to the framing.
Screws are not needed on the horizontal sides of the speaker panel that do not have framing behind them. Be sure to maintain flushness between the perimeter screw flange of the speaker panel and the surrounding wallboard. Do not use nails.

Step 7:
Recheck Speaker Registration
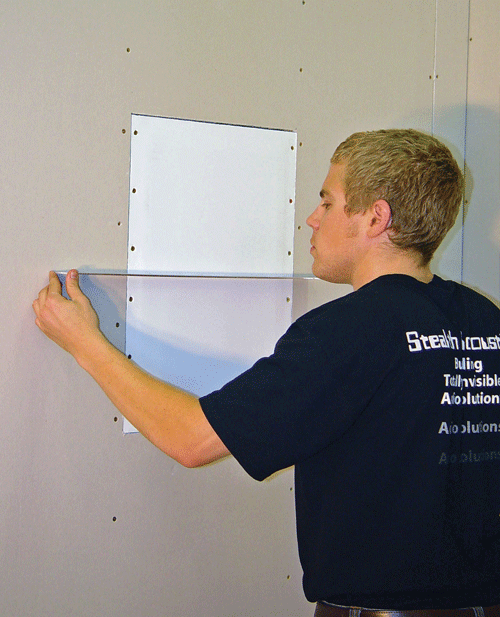
Now that the speaker is secured, recheck that the outer edge of the speaker is flush with the surrounding drywall. Also, use a straight edge to test that the middle of the speaker is 1/16″ beyond the wall by laying the edge across the face of the speaker to make sure their is a small gap at the edge. This will minimize the amount of drywall mud compound that is built up over the face of the speaker when the seam between the drywall and speaker is mudded. This 1/16″ protrusion for the speaker face will become invisible after the wall is properly mudded and sanded.


Step 8:
Test Speaker Sound
Test each speaker and wiring installation with an amplified sound source to ensure that everything is connected and working properly prior to taping and finishing. Test with music in addition to tones to ensure everything is sounding as it should. Make note of sound coming from high, mid, and low frequency drivers.

Step 9:
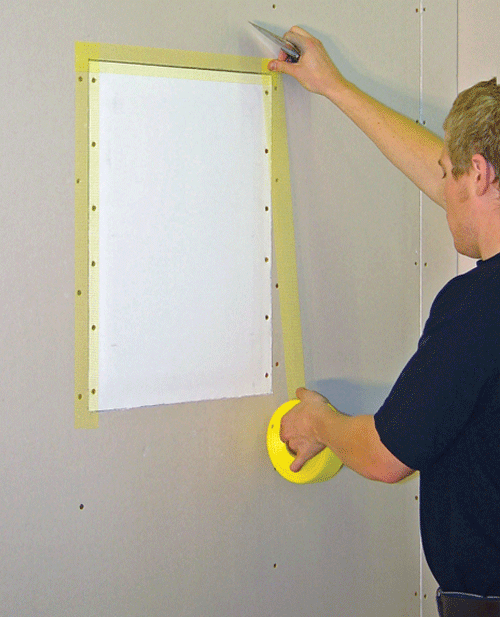
Tape the Joint
After testing the speaker sound and speaker alignment, you can begin with tapping and mudding the speaker. We recommend using self-adhesive nylon mesh tape. Mud can be pushed into the crack around the speaker panel before taping to make mudding easier after taping.

Step 10:
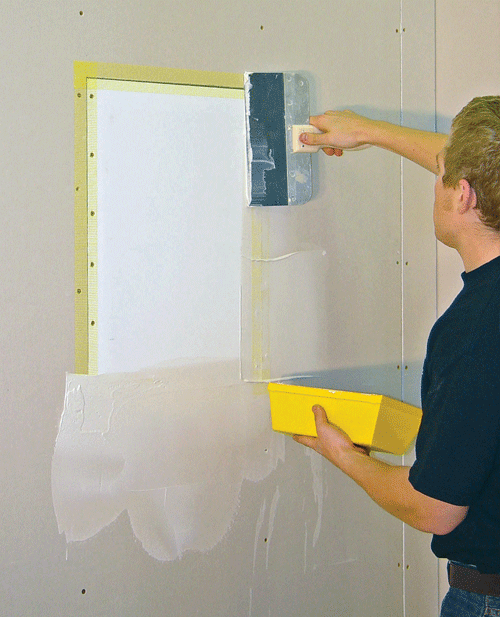
Mud the Joint
The speaker panel can be mudded similar to a piece of drywall. Be sure to feather the joint compound away from the speaker as to not build up more than the maximum allowed 1/16″ (1.5 mm) of mud over the face of the speaker panel.
It is important that enough joint compound be applied around the speaker to make a very gradual transition from the surface of the wallboard to the face of the speaker panel. It will normally take at least a 12” (30 cm) fan of joint compound around the perimeter of the panel to create a seamless transition. For best results, we recommend two or three light applications and sanding of joint compound instead of one heavy application. (In general applying a lot of mud in one application is more susceptible to cracking)
Stealth Acoustics speakers do not require a skim coat to attain a smooth finish. However, some advanced finishing techniques such as Venetian plaster may require covering the speaker face panel. In these situations, avoid build-up of more than 1/16″ (1.5 mm) in thickness on the face of the speaker.

Step 11:
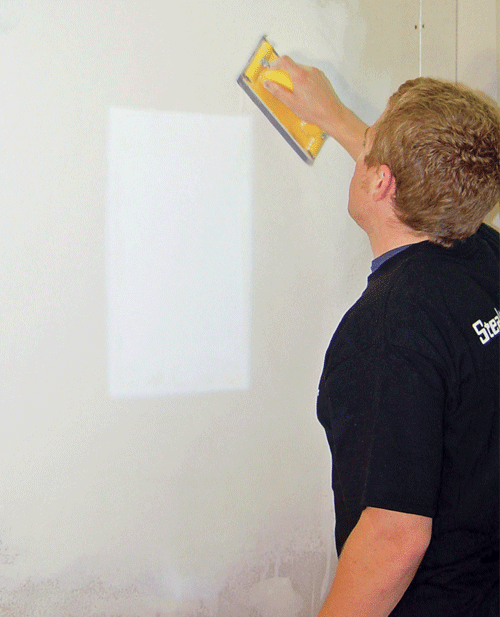
Sand smooth
Sanding is the last important step before the painting begins. This can make or break the quality of the installation. When sanding, imperfections in the application of the joint compound may appear. If so, additional joint compound and sanding may be needed to create a seamless transition.

Step 12:
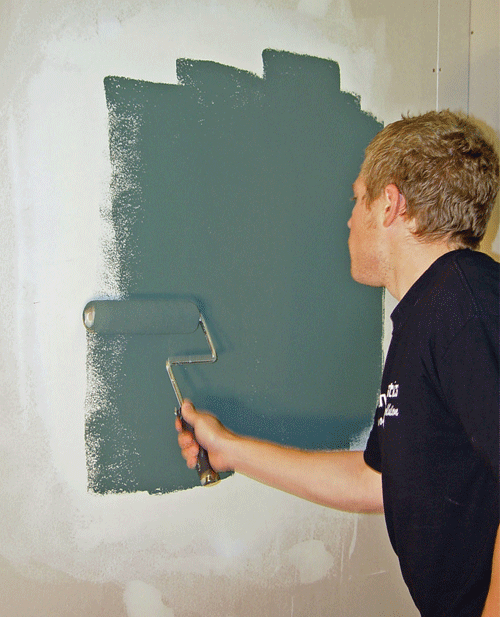
Paint and Finish
Once sanding is complete the face panel is ready for painting. Stealth Acoustics speaker face panels are engineered for optimum audio performance with four coats of latex paint applied to the surface. A light spray-on “orange peel” texture can be applied, or even light wallpaper. Heavy knock down or trowel finishes are not recommended. For use with advanced wall finishes, please contact Stealth Acoustics.


